REVIEW · ODDA
Odda: Trolltunga Zipline Adventure
Book on GetYourGuide →Operated by Trolltunga Active AS · Bookable on GetYourGuide
Trolltunga looks far, but this day makes it feel close. You’ll bike and hike up into the Tyssedal area, then strap in for a high, guided zipline run with big views of Ringedal Lake and the Trolltunga area. It’s a one-day mix of effort and adrenaline that still feels grounded in Norway’s mountain setting.
I especially love how the guides manage the whole flow with calm control. Seeing safety-first coaching from guides like Sona and Stepan gives you confidence fast. I also like that the views don’t arrive late in the day—you get stunning scenery as you move from Ringedalen Dam toward the zipline start.
One consideration: this is not a sit-and-spectate tour. You need to bike, you need solid fitness for uphill walking, and if you have vertigo or recent surgery concerns, this won’t be your best match.
In This Review
- Key Things I’d Plan Around
- A One-Day Odda Day That Blends Effort With Big Views
- Getting There: Skjeggedal Base and a Smart Arrival Plan
- The Morning Start: Ringedalen Dam to the Bike Stretch
- Uphill to Tyssebotn: When the Climb Becomes Worth It
- Lunch Break Before the Ziplines
- The Zipline Course: 3 Ziplines and 600 Meters of Motion
- The Finish: Descending 200 Meters Back Toward the Lake
- Winter Snow Hike Touch: A Cold-Season Bonus
- What to Bring: Your Cold-Weather Checklist That Actually Matters
- Who This Tour Fits (and Who Should Skip It)
- Price and Value: Is $199 Worth It?
- Safety Style: What Good Guidance Feels Like
- Should You Book This Odda Trolltunga Zipline Day?
- FAQ
- How long is the Odda Trolltunga Zipline Adventure?
- Where do I meet for the tour?
- How many ziplines are included?
- What’s the total zipline length and height change?
- Is lunch included?
- What should I bring for the day?
- Is this tour suitable for children?
Key Things I’d Plan Around
- Three ziplines, 600 meters total: shorter than it sounds, but the pacing keeps it fun, not rushed.
- Ringedalen Lake and Trolltunga viewpoints: you’ll see the water and crags from multiple angles as the route climbs and drops.
- It starts with work: 7 km of biking plus uphill walking sets you up for the zipline.
- Safety coaching from your guide: the Sona/Stepan vibe is practical, steady, and confidence-building.
- Bring real cold-weather gear: warm layers, wind protection, and waterproof boots matter outdoors.
A One-Day Odda Day That Blends Effort With Big Views
This Odda-area adventure is built around momentum. You don’t just arrive, zip once, and leave. You move through the Tyssedal mountains step by step—cycling along the Ringedalen area, walking up toward the zipline start, then flying along a course that finishes with a descent back toward the lake.
That structure is what makes the experience click. The biking and short climb act like a warm-up. By the time you reach the zipline start, you’re already in the right mindset: you’ve earned your views, and you know where you’re going.
You’ll also catch scenery that feels like it’s layered—Ringedalen water, canyon cuts, waterfall glimpses, and in the wider region, the Folgefonna glacier shows up in the highlight notes. Even when clouds roll in, the sense of height and depth stays real because you’re moving across the terrain, not just staring at it.
Getting There: Skjeggedal Base and a Smart Arrival Plan
You meet at Trolltunga Active Base in Skjeggedal 20, 5770 Tyssedal. Plan to arrive early enough to get settled in layers and kit up without stress. This type of activity depends on feeling comfortable before you clip in, and cold wind changes fast in the mountains.
Parking is a practical thing to watch. One review mentions a NOK 500 parking fee even for 4 hours. Even if your travel style is flexible, this is the kind of extra cost that can surprise you, so I’d mentally budget for it.
If you’re traveling with friends, agree on a meeting time at the base rather than trying to coordinate late arrivals after you’ve all geared up. Once boots and gloves are on, it’s easy to lose time to small adjustments.
The Morning Start: Ringedalen Dam to the Bike Stretch
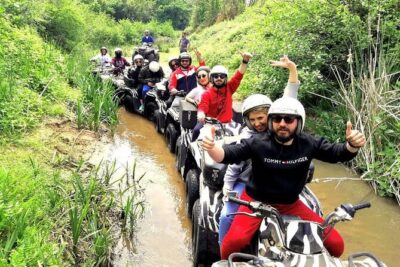
Your day begins at the Ringedalen Dam in Skjeggedal. From there, you bike about 7 kilometers to the end of Ringedalen Lake. This is the part of the plan that many people underestimate—seven kilometers doesn’t sound huge, but you’re doing it before any adrenaline hit, and weather can add resistance.
I like this opening because it keeps the group together naturally. It also places you close to the setting you’ll later cross from above. By the time you’re approaching the end of the lake area, you get a better sense of the water, the slope, and where the zipline course will live in relation to the canyons.
What can be tough here is cold and wet surfaces. Bring the waterproof mindset seriously—your biking time sets your comfort level for the rest of the day.
Uphill to Tyssebotn: When the Climb Becomes Worth It
After the bike, there’s a half kilometer uphill walk to Tyssebotn. Short, yes. Easy, no—because you’re going up, and you’re doing it in a place where wind can make you feel colder than you expect.
This climb matters because it changes your perspective. You’re not just moving to a platform; you’re moving to a vantage point. The payoff comes when the zipline start opens up the view lines over Ringedal Lake and the Trolltunga area.
If you’re the type who gets breathless on uphill terrain, this is where you’ll feel it first. Go slow, keep steady effort, and focus on the guide’s pacing rather than trying to “win” the incline.
Lunch Break Before the Ziplines
There’s a quick lunch stop at the Tyssebotn area before you head into the zipline run. Lunch isn’t included, so you’ll want to carry your own food.
This is one of the most important planning details for your energy. You’ll be active for hours outdoors, then you’ll add height and focus. If you show up hungry, it’s harder to stay calm and enjoy the ride.
You should bring enough food and water to last 4–6 hours. That’s not about luxury. It’s about keeping your hands steady, your body warm, and your head clear once you’re in safety gear.
The Zipline Course: 3 Ziplines and 600 Meters of Motion
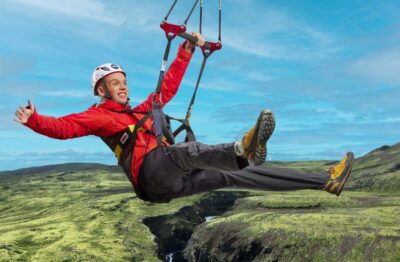
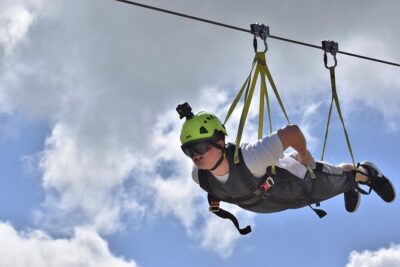
Now comes the headline: a guided zipline adventure with 3 ziplines and about 600 meters total of riding. The course runs over deep canyons, with the notes calling out views over Ringedal Lake and waterfall scenery in shades of blue-green.
The best way to think about it: this isn’t one long, scary slide. It’s a sequence. That matters because you get to adjust your breathing and posture between segments, and the guide can reinforce what’s safe and what to do with your body.
The timing of the views is also key. You get open angles over water and valleys while you’re mid-flight, not only at the start platform. It’s the kind of scenery that makes you stop thinking about your feet and start feeling the terrain passing below you.
The Finish: Descending 200 Meters Back Toward the Lake
At the end of the course, you descend 200 meters back down to the lake. That drop changes the feel of the day. You go from “fly mode” back into mountain realism—wind, footing, and the sense of where you’ll walk next.
I like that the tour ends with you returning toward water rather than finishing in a hard-to-get-to exit. It keeps the day’s rhythm clean: climb in, zip across, come down with the scenery still close.
If you’re tempted to rush the post-zip portion, don’t. Your body is warm and alert from adrenaline, but cold can creep in quickly when you stop moving.
Winter Snow Hike Touch: A Cold-Season Bonus
The highlights mention a guided hike through the snow and a beautiful winter landscape. That sounds seasonal, so you should expect conditions to depend on the time of year and snow cover.
If you’re visiting in colder months, this is a big reason to book. Snow hiking adds traction challenges and sharper contrasts—everything looks more defined. Just don’t treat it like a stroll. You’ll want warm layers that keep you dry and warm as the day progresses.
What to Bring: Your Cold-Weather Checklist That Actually Matters
This is the kind of tour where clothing is safety. The activity notes strongly recommend:
- Warm clothing and wool socks and wool thermals
- A wind jacket
- Waterproof pants
- Waterproof hiking boots
- Sunglasses plus sunscreen
- A hat or beanie that covers your ears, and warm gloves/mittens
If you’re thinking, I only need a jacket, don’t. The combination of biking, walking uphill, and being outdoors makes layers essential. You’ll get warm moving, then you’ll cool down while waiting and during the setup.
Also bring food and water for 4–6 hours. It’s not just for lunch—it’s for the whole outdoor stretch.
Who This Tour Fits (and Who Should Skip It)
This isn’t for everyone, and the restrictions make sense. It’s not suitable for:
- Children under 12
- Anyone who can’t ride a bike
- People with vertigo
- People over 220 lbs (100 kg)
- Anyone with recent surgeries
- People with low fitness
If you’re an active traveler who can bike and walk uphill for short periods, you’ll probably feel good about the effort-to-adrenaline ratio.
If you’re scared of heights, this one is probably not worth forcing. Even with strong guidance, vertigo needs respect.
If you’re unsure about your fitness, be honest about how you handle uphill terrain. The walk isn’t long, but it is uphill and part of the overall stamina math.
Price and Value: Is $199 Worth It?
The price is $199 per person for a 1-day tour. Lunch isn’t included, but you do get bicycle, climbing/zipline equipment, and a professional guide.
Here’s how I’d judge the value. You’re paying not just for the ziplines, but for the full operational package: safe equipment, guided timing, coaching, and a full route that builds up to the zipline start. The cycling + hike format means you get more than one “activity moment.” You’re moving through the area in a planned way.
The cost is also easier to swallow when you compare it to booking individual pieces on your own—getting equipment, arranging a proper guide, and coordinating safe transport to the right start points. For $199, you’re buying the whole active experience.
Just add in realistic extras. Bring your own lunch, and consider that parking could cost extra (one review cites NOK 500 for up to 4 hours).
Safety Style: What Good Guidance Feels Like
The guides in the feedback—especially Sona and Stepan—are praised for being above-and-beyond and for maintaining a strong safety mindset. That’s exactly what you want on a zipline day. Confidence comes from clarity: how to clip in, how to position yourself, what to expect at each segment.
A calm safety tone also changes your experience. You don’t spend your ride mentally wrestling the process. You listen, you follow, and you enjoy.
Even if you’re experienced, I’d still treat the guide’s instructions as your main source of “how this day works.” Mountain conditions can change, and the guide’s job is to make that safe and predictable.
Should You Book This Odda Trolltunga Zipline Day?
Book it if you want a single-day adventure that blends outdoor effort with a real adrenaline payoff—and you like guided coaching more than self-guided chaos. The combination of biking, an uphill push to the zipline area, and a multi-part zipline course makes it feel like a full outing, not a quick thrill stop.
Skip it if you can’t ride a bike, struggle with uphill walks, have vertigo, or have medical limitations that make heights risky. Also think twice if cold weather gear is a hassle for you—this is an outdoor day, and being properly layered makes the experience much better.
If you’re the type who enjoys moving through scenery rather than just watching it, this one is a strong match.
FAQ
How long is the Odda Trolltunga Zipline Adventure?
It’s a 1-day tour.
Where do I meet for the tour?
You meet at Trolltunga Active Base in Skjeggedal 20, 5770 Tyssedal.
How many ziplines are included?
The zipline course includes 3 ziplines.
What’s the total zipline length and height change?
The total zipline length is 600 meters, and the course includes a 200-meter descent back down to the lake.
Is lunch included?
No. Lunch is not included, so you’ll need to bring food.
What should I bring for the day?
Bring warm clothing, a windbreaker, sunglasses, hat, and sunscreen. The tour also recommends wool socks and thermals, waterproof pants, waterproof boots, warm gloves/mittens, and extra warm clothes.
Is this tour suitable for children?
No. It’s not suitable for children under 12.